
Using a Spectra Wearable 2 Breast Pump can make expressing breast milk more convenient for mothers who want greater freedom to move around while pumping. Unlike traditional breast pumps that usually require you to sit beside a power outlet or remain connected to a larger pump unit, a wearable design is intended to fit more easily into your daily routine. However, getting comfortable with a wearable breast pump takes some practice. 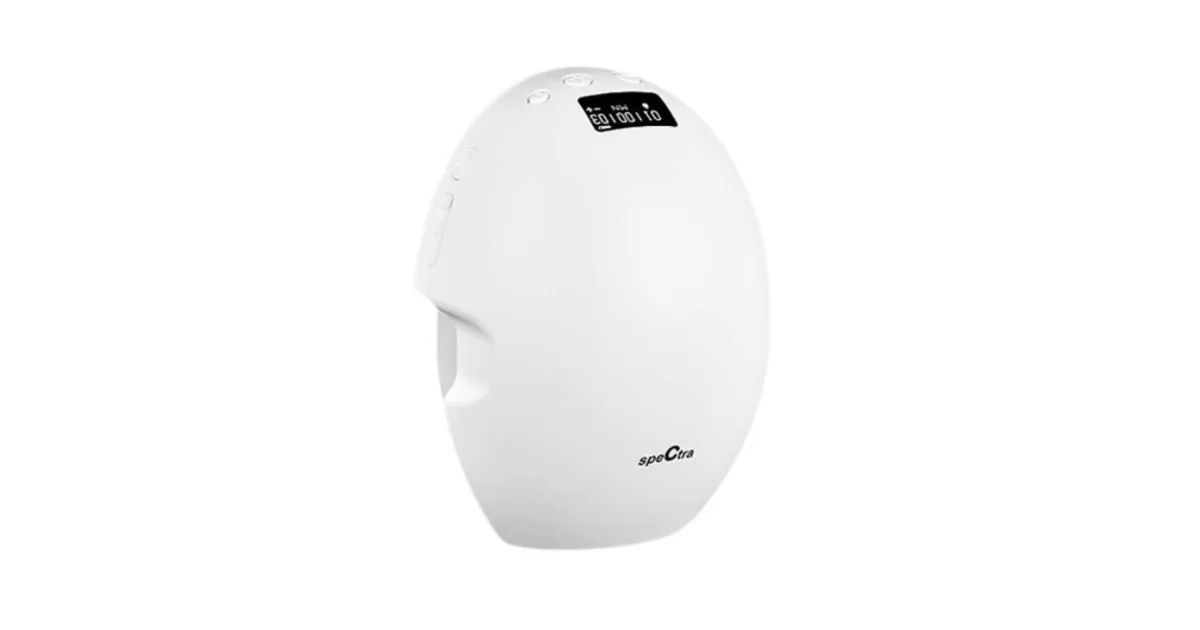
The first few times you use a Spectra Wearable 2 Breast Pump, it may take a little experimentation to find the settings and positioning that work best for you. Every mother's body responds differently to pumping, so there is no single setting that is perfect for everyone. The goal is to create a comfortable pumping experience that allows milk to flow effectively without causing unnecessary discomfort.
This comprehensive guide explains how to use the pump from start to finish. It covers preparation, assembly, positioning, pumping settings, milk collection, cleaning, storage, troubleshooting, and practical tips for getting better results.
What Is the Spectra Wearable 2 Breast Pump?
The Spectra Wearable 2 Breast Pump is designed to provide a more flexible way to express breast milk. Its wearable style allows the collection components to be positioned inside or around the bra area, depending on the specific model and configuration, giving the user more freedom than a traditional stationary breast pump.
The main advantage of a wearable pump is convenience. Instead of having to sit in one location for every pumping session, a mother may be able to move around more easily while expressing milk. This can be particularly useful for people returning to work, caring for other children, doing light household activities, or managing a busy daily schedule.
However, convenience should not be confused with completely hands-free operation in every situation. You still need to make sure the pump is positioned correctly, the milk collection container has enough capacity, and the breast shield is properly aligned.
A good pumping routine depends on more than simply turning the device on. Correct flange or breast shield sizing, a proper seal, comfortable suction, and regular cleaning all affect the overall experience.
What Should You Do Before Using the Pump?
Before your first pumping session, take some time to become familiar with the components. Read the manufacturer's instructions for your exact model because wearable pump designs and controls can differ between versions.
Check that all required parts are present and clean. Depending on the design, the pump may include components such as a breast shield, milk collection container, valve, membrane, motor unit, charging system, and other accessories.
Inspect every component before use. Look for cracks, damaged seals, loose parts, or anything that appears worn or defective. Damaged components can affect suction and may cause milk leakage.
If the pump is rechargeable, charge it before your first session. Starting with a fully charged battery is especially helpful if you plan to pump away from home.
Wash your hands thoroughly before handling the parts that come into contact with your breast or milk. Clean hands reduce the chance of transferring bacteria to pumping equipment or expressed milk.
You should also choose a comfortable place for your first few sessions. Even though a wearable pump is designed to offer mobility, it is useful to remain seated during your initial attempts so you can concentrate on positioning and settings.
How Do You Assemble the Spectra Wearable 2 Breast Pump?
Assembly is one of the most important steps because incorrect assembly can lead to poor suction, leaking, or reduced milk collection.
Begin by making sure every washable component is clean and completely dry. Moisture left inside certain parts may affect the performance of the pump or create an environment where bacteria can grow.
Follow the manufacturer's assembly instructions carefully. Connect the breast shield or flange to the milk collection section as instructed. Make sure the membrane and valve are positioned correctly.
The membrane is particularly important because it helps create and maintain the suction system. If it is folded, damaged, incorrectly positioned, or not properly attached, the pump may not work as expected.
Check the connection between the motor and the collection assembly. The components should fit securely without forcing them together.
Once everything is assembled, gently inspect the unit for gaps or loose connections. If the parts do not sit together properly, take them apart and reassemble them rather than trying to operate the pump immediately.
Before placing the pump against your breast, make sure the battery is sufficiently charged and the controls are accessible.
How Do You Position the Pump Correctly?
Correct positioning is one of the biggest factors affecting comfort and milk output.
Start by placing the breast shield so that your nipple is centered inside the tunnel. Your nipple should be able to move freely without rubbing excessively against the sides.
The breast shield should sit comfortably against the breast and create a good seal. However, it should not be pressed so tightly that it causes unnecessary pressure or pain.
If your nipple is not centered, the pump may pull unevenly. This can cause discomfort and may interfere with milk removal.
Take a moment to check your position before starting the motor. If the pump is wearable, make sure it is sitting securely inside your bra or against your breast according to the manufacturer's instructions.
Your bra should provide enough support to keep the pump in place without compressing your breast excessively. A very tight bra can create pressure points and may make pumping uncomfortable.
It can take several attempts to find the best position. If you experience persistent pain, stop the session and reposition the pump.
How Do You Turn On the Pump?
Once the pump is correctly positioned, turn on the motor using the power control.
Start at a low and comfortable suction level. It is generally not necessary to begin with the strongest suction.
Many new pumping users make the mistake of thinking that higher suction automatically means more milk. This is not necessarily true. Excessive suction can cause discomfort and may make it harder for the body to relax and release milk.
Start gently and allow your body to adjust. Once milk begins to flow and you feel comfortable, you can gradually adjust the settings if necessary.
The exact controls available will depend on your specific pump model. Use the manufacturer's instructions to understand which buttons control power, suction, expression, or other functions.
During your first sessions, pay attention to how your body responds rather than focusing only on the number displayed on the pump.
How Do You Choose the Right Pumping Settings?
Finding the right settings is a personal process.
A typical pumping session may involve a stimulation or massage phase followed by an expression phase. The stimulation phase is generally intended to encourage the milk ejection reflex, while the expression phase is used to help remove milk.
Begin with a comfortable stimulation setting. The goal is to encourage milk flow without causing pain.
Once milk begins flowing more consistently, you may switch to the expression mode if your pump provides one.
Adjust suction gradually. You should feel a firm pulling sensation, but pumping should not be painful.
If the suction feels uncomfortable, reduce the level. Pain is not a sign that the pump is working better.
If milk flow slows significantly, some mothers find it useful to return briefly to stimulation mode and then switch back to expression mode. This may help encourage another let-down.
The most effective setting is the one that allows you to remove milk comfortably and efficiently. Your ideal settings may also change depending on the time of day, how full your breasts are, and your individual response.
How Long Should You Use the Pump?
The length of a pumping session varies from person to person.
Some mothers may finish a session relatively quickly, while others may need more time. Rather than relying only on a specific number of minutes, pay attention to milk flow and comfort.
You can often continue pumping while milk is flowing comfortably. When milk flow becomes very slow, you may decide that the session is complete.
If you are pumping to maintain or increase milk production, consistency is usually more important than trying to make every individual session extremely long.
Your pumping schedule may depend on whether you are exclusively pumping, combining breastfeeding and pumping, expressing milk occasionally, or pumping while separated from your baby.
If you are unsure about how often you should pump for your specific situation, consult a qualified lactation professional or healthcare provider.
How Can You Improve Milk Flow During Pumping?
Relaxation can have a significant effect on the pumping experience.
Stress, rushing, and discomfort may make it harder for some mothers to experience a strong milk ejection reflex. Creating a calm routine can sometimes help.
Before starting, take a few slow breaths. Sit comfortably and make sure your shoulders are relaxed.
Some mothers find that looking at a picture or video of their baby can help them feel more relaxed. Others prefer listening to quiet music or simply taking a few minutes to settle before beginning.
Warmth may also be helpful for some people. A warm shower or a comfortably warm compress before pumping may help encourage relaxation.
Gentle breast massage before or during pumping can also be useful for some mothers. However, massage should be comfortable and should not involve aggressive pressure.
The key is to find a routine that helps your body relax.
What Should You Do If Pumping Feels Painful?
Pumping should not cause significant or persistent pain.
If you experience pain, stop or reduce the suction and check the pump position.
The first thing to examine is nipple alignment. Make sure the nipple is centered in the breast shield and is not rubbing continuously against the tunnel.
Next, consider whether the breast shield size is appropriate. A shield that is too small or too large may cause discomfort and can affect milk removal.
Also check the suction strength. Stronger suction is not automatically better.
If you continue experiencing pain despite adjusting positioning and suction, consider speaking with a lactation consultant or healthcare professional.
Persistent pain, nipple damage, bleeding, significant swelling, or other concerning symptoms should not be ignored.
How Do You Know When the Pumping Session Is Finished?
There is no universal rule that determines the exact moment every mother should stop pumping.
In many cases, you can observe the milk flow. Early in a session, milk may flow more quickly. Later, the flow may become slower and less frequent.
If milk flow has slowed substantially and you are comfortable, you may decide to end the session.
Some mothers choose to continue for a short period after the main flow slows, while others stop once the flow becomes minimal.
Your personal pumping goals matter. Someone pumping occasionally for convenience may have a different routine from someone exclusively pumping.
Avoid continuing for an unnecessarily long period simply because you believe longer pumping always produces better results. Comfort and overall routine are important.
How Do You Remove the Pump After Use?
When your pumping session is complete, turn off the motor before removing the pump.
Carefully detach the pump from your breast. Avoid pulling suddenly or removing it while suction is still active.
If the pump has created a strong seal, release the suction according to the manufacturer's instructions before removing it.
After removing the unit, place it on a clean surface.
Transfer the collected milk into an appropriate storage container if necessary. Label the container according to your normal milk-storage routine, including the date and time if you are storing it for later use.
Try to avoid unnecessary handling of expressed milk.
If you are pumping both breasts during the same session, repeat the process on the other side according to your routine.
How Should You Clean the Pump?
Cleaning is an essential part of using any breast pump.
After pumping, separate the washable components according to the manufacturer's instructions.
Rinse milk-contact parts as recommended. Wash them thoroughly using appropriate dish soap and clean water.
Pay special attention to small parts such as valves and membranes. Milk residue can remain in small openings if the components are not cleaned carefully.
Allow the parts to air-dry completely on a clean drying surface. Avoid drying milk-contact components with a used kitchen towel because towels can transfer bacteria and other contaminants.
The motor or electronic components should not be submerged in water unless the manufacturer specifically states that they are waterproof or washable.
Follow the manufacturer's cleaning recommendations for the exact model you own.
Regular cleaning is important not only for hygiene but also for pump performance. Residue buildup can interfere with valves, membranes, and other components.
How Often Should Pump Parts Be Sanitized?
Cleaning and sanitizing are not necessarily the same thing.
Cleaning removes milk residue and other visible material. Sanitizing is an additional step intended to reduce germs.
The appropriate sanitizing routine can depend on the baby's age, health, and the manufacturer's instructions.
Some families may sanitize parts more frequently when caring for very young infants or babies with specific health needs.
Always follow current guidance from your healthcare provider and the pump manufacturer.
If you use heat, steam, or boiling water for sanitizing, confirm that the individual pump components are designed to tolerate that method. Some materials can become damaged by excessive heat.
Never assume that every part can be boiled or placed in a sterilizer.
How Should Expressed Milk Be Handled?
Once you finish pumping, handle the expressed milk carefully.
Use clean containers designed for breast milk storage. Avoid transferring milk into containers that are not intended for food storage.
If you are combining milk from different pumping sessions, follow appropriate milk-handling practices. In particular, freshly expressed warm milk should generally be cooled before combining it with already chilled milk.
Store milk according to current recommendations from reputable health authorities or your healthcare provider.
When storing milk, leave some room in the container if freezing because liquid expands as it freezes.
Label stored milk clearly. Using the oldest milk first can help reduce unnecessary waste.
If you are unsure whether stored milk is still safe to use, consult current official breast milk storage guidelines rather than relying on guesswork.
What Are Common Problems When Using the Pump?
New users often experience a few common problems.
One issue is weak suction. This may happen if a membrane is not positioned correctly, a valve is damaged, or the pump is not properly assembled.
Another common problem is milk leaking. This may be caused by incorrect positioning, an incomplete seal, an overfilled collection container, or a damaged component.
Some users may also notice reduced milk output. Before assuming the pump is ineffective, check your breast shield size, positioning, suction settings, and pump parts.
A worn valve or membrane can also affect performance over time.
If the pump suddenly behaves differently from normal, inspect the components carefully.
Replacing worn parts according to the manufacturer's recommendations may restore performance.
What Should You Do If Suction Is Weak?
If your pump does not seem to provide enough suction, begin by checking the assembly.
Make sure all components are securely connected.
Inspect the membrane and valve for damage or incorrect positioning.
Check the breast shield seal against your breast. A poor seal can significantly reduce suction.
Also check whether your nipple is correctly centered.
If everything appears correct but the suction remains weak, check whether the battery needs charging.
If the problem continues, consult the troubleshooting section of the manufacturer's instructions or contact the manufacturer's customer support.
Avoid attempting to repair electronic components yourself unless the manufacturer specifically provides instructions for doing so.
What Should You Do If the Pump Leaks?
Leaks can be frustrating, but they are often caused by positioning or assembly problems.
First, check that the collection container is not overfilled.
Next, inspect the seals and connections. Make sure the membrane and valve are properly installed.
Check that the breast shield is sitting evenly against your breast.
If you are moving while pumping, sudden bending or excessive movement may also contribute to leakage, especially if the collection container is close to full.
Empty the milk container before it reaches its maximum capacity whenever possible.
If leakage continues despite correct assembly and positioning, inspect the parts for cracks or damage.
How Can You Make Wearable Pumping More Comfortable?
Comfort should be a priority throughout the pumping session.
Start with the correct breast shield size. A comfortable fit can make a major difference.
Wear a supportive bra that holds the pump securely but does not compress your breast too tightly.
Avoid clothing that creates unnecessary pressure around the pump.
When starting a session, use a lower suction level and gradually increase it only if needed.
If your body feels tense, pause and reposition yourself.
You may also want to experiment with your sitting position. A relaxed posture can make pumping more comfortable.
Remember that a wearable pump is designed to make pumping more convenient, not to force you to ignore discomfort.
Can You Move Around While Pumping?
One of the main benefits of the Spectra Wearable 2 Breast Pump is the possibility of greater mobility.
However, movement should be gradual, especially when you are still learning how the pump fits.
Start with simple activities such as standing or walking slowly.
Avoid strenuous exercise or activities that could cause the pump to shift.
Pay attention to the milk container. If it becomes full, stop and empty it.
You should also be cautious about bending forward or making sudden movements because these can increase the chance of leakage.
The more familiar you become with the pump, the easier it may be to determine which activities are practical while wearing it.
How Can You Get Better Results From Your Pump?
The most important factor is consistency.
Try to establish a pumping routine that fits your lifestyle and your milk-expression goals.
Make sure the pump is correctly positioned every time.
Use comfortable suction rather than automatically choosing the strongest setting.
Keep pump parts clean and replace worn components when necessary.
Stay hydrated according to your normal thirst and maintain a balanced diet. However, remember that drinking excessive amounts of fluid does not automatically guarantee increased milk production.
Rest is also important. Caring for a baby can be physically and emotionally demanding, and fatigue can make pumping more difficult.
If you are concerned about milk supply, consider working with a qualified lactation consultant rather than relying only on pump settings.
How Should You Store the Pump Between Sessions?
After cleaning, allow all washable parts to dry completely before storage.
Store clean components in a dry, clean location.
Avoid placing wet parts inside a closed container because trapped moisture can encourage microbial growth.
Keep electronic components protected from water and excessive humidity.
If you are traveling with the pump, consider using a clean storage bag or container designed to keep the components protected.
Do not store clean pump parts together with dirty equipment.
Keeping a simple routine for cleaning, drying, and storage can make daily pumping much easier.
How Do You Maintain the Pump Over Time?
Regular inspection can help keep the pump working properly.
Check valves, membranes, seals, and other frequently used components for signs of wear.
Some parts may need replacement periodically, depending on how frequently you pump and the manufacturer's recommendations.
If suction becomes weaker over time, do not immediately assume the motor has failed. Small wearable pump components can wear out and affect performance.
Keep the motor and charging system in good condition.
Use the correct charger or charging equipment recommended by the manufacturer.
Avoid exposing electronic components to excessive heat, moisture, or physical damage.
Proper maintenance can help extend the useful life of your pump and keep your pumping routine more reliable.
What Mistakes Should New Users Avoid?
One of the most common mistakes is using excessive suction.
More suction does not always mean more milk. In fact, excessive suction may cause discomfort and irritation.
Another mistake is using the wrong breast shield size.
Incorrect sizing can affect comfort and milk removal.
Some users also fail to check the pump's positioning after putting on clothing. A slight shift can change the seal and reduce performance.
Another mistake is ignoring damaged parts. A cracked valve or worn membrane can affect suction and lead to disappointing results.
Finally, some new users expect immediate results. It can take time to learn how your body responds to a wearable pump.
Give yourself time to practice.
When Should You Ask for Professional Help?
You should consider professional support if you experience persistent pain, repeated nipple injury, or significant difficulty expressing milk.
A lactation consultant can help evaluate positioning, breast shield sizing, pumping technique, and your overall routine.
If you notice symptoms that concern you, such as significant breast pain, redness, swelling, fever, or other signs of possible infection, contact a qualified healthcare professional.
A pump is a tool, and it cannot diagnose or treat medical problems.
If you have concerns about your baby's feeding, weight gain, or milk intake, seek guidance from your pediatrician or another qualified healthcare provider.
How Can You Build a Simple Daily Pumping Routine?
A successful pumping routine should be realistic.
Begin by deciding when pumping fits naturally into your day.
Prepare clean pump components in advance.
Keep your charging system ready so you do not discover that the battery is empty when you need to pump.
If you work outside the home, consider preparing a dedicated pumping bag with clean equipment, storage containers, and cleaning supplies.
At home, keep your pump in a convenient location.
The easier it is to start a session, the less likely you are to postpone it.
You can also keep a simple record of pumping times and milk output if tracking helps you understand your routine.
However, do not become overly focused on measuring every session. Milk output can naturally vary.
Conclusion
Learning how to use the Spectra Wearable 2 Breast Pump properly is mainly about understanding the relationship between positioning, comfort, suction, hygiene, and consistency.
Start by assembling the pump correctly and making sure every milk-contact component is clean and dry. Position the breast shield carefully so that your nipple is centered and the pump creates a comfortable seal.
When you begin pumping, start with gentle settings and gradually adjust them according to your comfort and milk flow. Avoid assuming that the strongest suction will automatically provide the best results.
Pay attention to your body. Pumping should not cause persistent or significant pain. If something feels wrong, stop the session, check your positioning, and adjust the settings.
Cleaning is equally important. Wash milk-contact components after use, allow them to dry completely, and follow the manufacturer's recommendations for sanitizing and replacing parts.
The wearable design can make pumping more flexible, but it still requires proper technique. Take time to learn how the pump fits your body, how your milk responds to different settings, and which parts of your daily routine work best with it.
Most importantly, remember that every breastfeeding and pumping experience is different. One mother's ideal settings, schedule, or pumping duration may not be the right choice for another mother.
If you are struggling with pain, low milk output, or other concerns, professional lactation support can be extremely valuable. A qualified lactation consultant can help you identify practical changes that may improve your experience.
With correct assembly, proper positioning, comfortable suction, careful cleaning, and a consistent routine, the Spectra Wearable 2 Breast Pump can become a useful part of a mother's milk-expression routine. The goal is not simply to operate the pump correctly. The goal is to create a safe, comfortable, and sustainable pumping experience that fits your individual needs and lifestyle.